How to Build a Smart Home with Raspberry Pi: A Comprehensive Guide
Are you looking to turn your home into a smart home? Have you heard about Raspberry Pi - the most versatile and cost-effective DIY platform for home automation enthusiasts? In this article, we will guide you on how to build a smart home with Raspberry Pi.
What is Raspberry Pi?
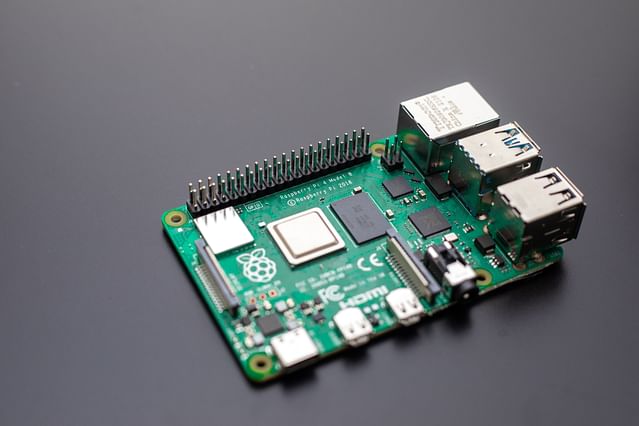
Raspberry Pi is a credit-card-sized computer that can be used for various DIY electronics projects. It was developed in the United Kingdom by the Raspberry Pi Foundation to promote the teaching of basic computer science in schools and developing countries.
Raspberry Pi can be used for a wide range of applications, including home automation systems, media centers, gaming systems, and even robotics projects. It is a low-cost, high-performance computer that can be easily programmed and customized for your needs.
Why use Raspberry Pi for home automation?
There are several benefits of using Raspberry Pi for home automation. First and foremost, it is a cost-effective solution that can save you a lot of money compared to buying a commercial smart home system. Secondly, it is a flexible and versatile platform that can be customized to fit your specific needs. Finally, it offers you complete control over your smart home system, giving you the freedom to experiment with different technologies and ideas.
How to build a smart home with Raspberry Pi?
Building a smart home with Raspberry Pi is easier than you may think. Here is a step-by-step guide to get you started:
1. Choose your home automation platform
The first thing you need to do is choose a home automation platform that is compatible with Raspberry Pi. Some popular options include Home Assistant, OpenHAB, and Node-RED. These platforms allow you to connect your Raspberry Pi to various smart devices and create custom automation rules.
2. Set up your Raspberry Pi
Once you have chosen your home automation platform, you need to set up your Raspberry Pi. This involves downloading the operating system (like Raspbian OS) and installing it on a microSD card. You will also need to connect the Raspberry Pi to a monitor, keyboard, and mouse.
3. Connect your smart home devices
After setting up your Raspberry Pi, you can start connecting your smart home devices. This includes devices like smart lights, thermostats, cameras, and door locks. You can connect these devices via Wi-Fi, Bluetooth, or even using physical wires.
4. Create your automation rules
Now that you have connected your smart devices, you can start creating your automation rules. With your chosen home automation platform, you can create custom routines that trigger your devices based on various conditions. For example, you can create a routine that turns on your lights when you come home from work, or turn off the thermostat when you leave the house.
5. Monitor and control your smart home
Once your smart home is set up, you can monitor and control it from your phone or computer. With the dashboard provided by your home automation platform, you can manage your devices, create new rules, and receive notifications when triggered events occur.
Conclusion
Building a smart home with Raspberry Pi is a fun and rewarding project that can save you a lot of money and give you complete control over your home automation system. With the right tools and some basic DIY skills, anyone can turn their home into a smart home. So, what are you waiting for? Get started today!
That's how you can build a smart home with Raspberry Pi. If you have any other questions or suggestions, please let us know in the comments section below.
Posted on: Aug 4, 2022 Last updated at: May 4, 2023