Using Raspberry Pi 3 for Home Automation: A Comprehensive Guide
If you're looking for a cost-effective and reliable way to automate your home, Raspberry Pi 3 might be the solution you need. With its small size, low power consumption, and affordable price, the Raspberry Pi 3 is an ideal device for creating a DIY home automation system.
In this post, we'll explain how you can use Raspberry Pi 3 for home automation and take full advantage of its capabilities. We'll cover everything from the basics of setting up your Raspberry Pi 3, to installing and configuring software, and creating your own custom home automation system.
What is Raspberry Pi 3?
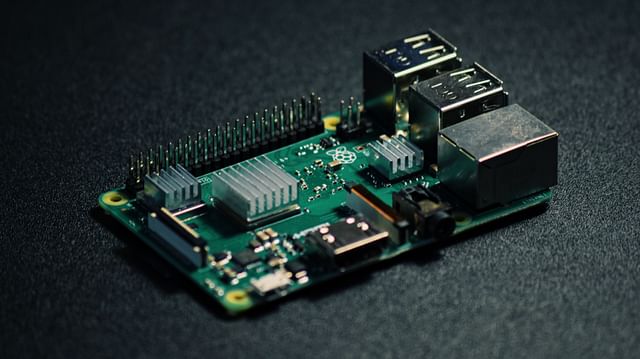
Raspberry Pi 3 is a small credit card-sized computer that was first released in 2016. It has a quad-core ARM Cortex-A53 processor and 1 GB of RAM, making it a powerful device for its size. Raspberry Pi 3 also has built-in Bluetooth and Wi-Fi capabilities, making it easy to connect to the internet, other devices, and sensors.
Setting Up Your Raspberry Pi 3
To get started with Raspberry Pi 3, you'll need:
- Raspberry Pi 3 board
- A microSD card (at least 8GB)
- Power supply (5V micro USB)
- Keyboard and mouse
- HDMI cable
- Monitor
Once you have these items, follow these steps:
- Download the Raspberry Pi OS image from the official website.
- Extract the downloaded image, and flash it onto the SD card using SD card flashing software like Etcher.
- Insert the flashed SD card into the Raspberry Pi 3, and connect it to a monitor using the HDMI cable.
- Connect a keyboard and mouse to the Raspberry Pi 3, and then connect the power supply.
Once you've completed these steps, the Raspberry Pi 3 will boot up and you'll be able to start working with it.
Installing Home Automation Software on Raspberry Pi 3
Raspberry Pi 3 is compatible with a wide range of home automation software, including openHAB, Home Assistant, and Node-RED. In this post, we'll focus on openHAB and walk you through the installation process.
openHAB is an open-source home automation platform that is free to use and easy to set up. It supports a wide range of devices and protocols, including Z-Wave, ZigBee, and KNX, making it a versatile choice for any home automation system.
To install openHAB on Raspberry Pi 3, follow these steps:
Open a terminal window on your Raspberry Pi 3, and run the following command to update the package repository:
sudo apt-get updateNext, run this command to install openHAB:
sudo apt-get install openhab2Once the installation is complete, openHAB will be running on your Raspberry Pi 3. To access the openHAB web interface, open a web browser and enter the following URL:
http://<your Raspberry Pi 3 IP address>:8080
With openHAB up and running on your Raspberry Pi 3, you can now start connecting your devices and creating your own custom home automation system.
Creating Your Own Custom Home Automation System
One of the greatest advantages of using Raspberry Pi 3 for home automation is the ability to create your own custom automation system. With openHAB, you can easily create rules and scripts that automate your home based on your specific needs and preferences.
For example, you can use openHAB to:
- Turn on the lights in your living room when the sun sets
- Lock your doors automatically at a certain time each night
- Receive a notification when someone rings your doorbell
To get started with creating your own custom home automation system, you'll need to install and configure the openHAB add-ons for your devices and sensors. Check the openHAB documentation for a full list of supported devices and how to connect them.
Conclusion
With Raspberry Pi 3, anyone can create a DIY home automation system that's both cost-effective and reliable. Whether you're just getting started with home automation, or you're an experienced DIY enthusiast, Raspberry Pi 3 is a powerful and versatile device that can help you take your home automation to the next level.
In this post, we showed you how to set up your Raspberry Pi 3, install openHAB, and create your own custom home automation system. With these steps, you can create a smarter and more convenient home that meets your specific needs and preferences.
Posted on: Dec 8, 2021 Last updated at: May 4, 2023