Using Raspberry Pi 3 for Your Smart Home Automation
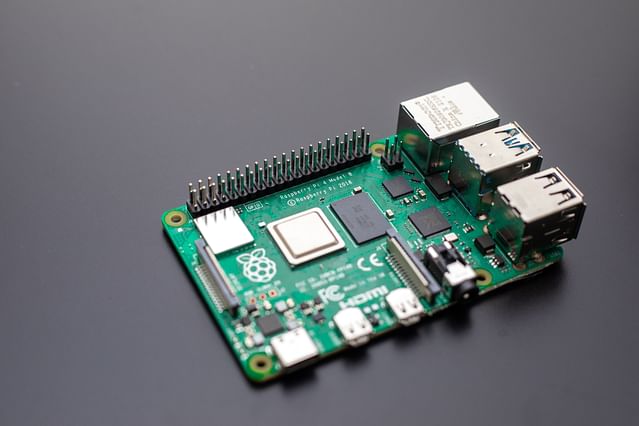
If you're looking for a way to enhance your home automation system and take it to the next level, look no further than the Raspberry Pi 3. The Raspberry Pi 3 is a versatile, single-board computer that can be used for a variety of purposes, including smart home automation.
With its powerful CPU, built-in Wi-Fi and Bluetooth capabilities, and a host of GPIO pins, the Raspberry Pi 3 is the perfect platform for creating a customized, do-it-yourself smart home system. Here's how to get started.
What is Raspberry Pi 3?
Raspberry Pi 3 is a single-board computer that is designed for use in small projects. It is a low-cost computer that can be used for a variety of purposes, including smart home automation.
Raspberry Pi 3 is designed for use in projects where a low-power computer is required. It is small enough to fit in your hand and can be connected to a monitor, keyboard, and mouse, just like a traditional desktop computer.
Setting Up Raspberry Pi 3 for Your Smart Home Automation
Setting up Raspberry Pi 3 for your smart home automation is a fairly simple process. Here are the steps you'll need to take:
Step 1: Get Your Raspberry Pi 3 Up and Running
Before you can use Raspberry Pi 3 for your smart home automation, you'll need to get it set up. This involves connecting it to a monitor, keyboard, and mouse, and then installing the operating system.
Raspberry Pi 3 is compatible with a number of different operating systems, including Linux and Windows 10 IoT. Once you've installed the operating system, you'll be ready to start setting up your smart home system.
Step 2: Choose and Install Your Smart Home Automation Software
The next step is to choose and install the smart home automation software that you'll be using. Some popular options include Home Assistant, OpenHAB, and Node-RED.
Once you've chosen your software, you'll need to install it on your Raspberry Pi 3. This will involve following the software's installation instructions, which will vary depending on the software you choose.
Step 3: Connect Your Smart Home Devices to Raspberry Pi 3
With your Raspberry Pi 3 and smart home automation software set up, you'll be ready to start connecting your smart home devices. This will involve following the instructions for each device, which will vary depending on the device you're using.
Most smart home devices will communicate with your Raspberry Pi 3 via Wi-Fi, Bluetooth, or another wireless protocol. Once your devices are connected, you'll be able to start controlling them via your smart home automation software.
Conclusion
Raspberry Pi 3 is a versatile, low-cost, single-board computer that is perfect for use in smart home automation projects. With its powerful CPU, built-in Wi-Fi and Bluetooth capabilities, and a host of GPIO pins, Raspberry Pi 3 is a great platform for creating your very own DIY smart home system.
Follow the steps outlined in this guide, and you'll be well on your way to creating a customized, tailored smart home automation system that meets all your needs and exceeds your expectations.
Posted on: Dec 18, 2022 Last updated at: May 4, 2023