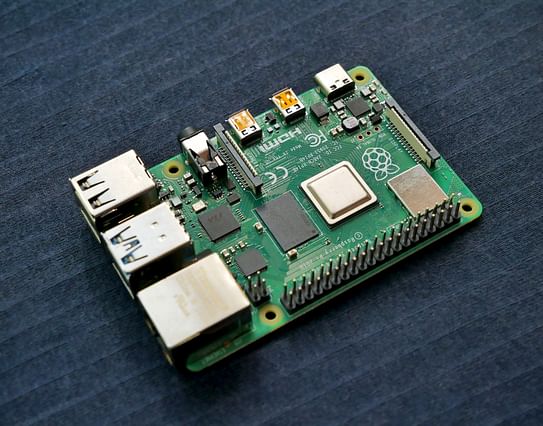
Z-Wave Gateway: How to Set Up a Raspberry Pi for Home Automation Control
Are you looking to set up a Z-Wave gateway with your Raspberry Pi? This guide will walk you through everything you need to know about configuring your smart home automation system using these devices.
First, what is a Z-Wave gateway? A Z-Wave gateway is a central hub for all of your smart home devices that use Z-Wave technology. The gateway communicates with the devices to control them and exchange information, and can be automated to optimize the performance of your devices.
Setting up a Z-Wave gateway on a Raspberry Pi is a great option for those looking for a customizable and affordable solution. Follow these steps to set up your very own Z-Wave gateway on your Raspberry Pi.
Step 1: Get a Raspberry Pi
The first step is to get a Raspberry Pi board. The Raspberry Pi is an affordable, low-power computer that can be used for various projects. You'll need at least a Raspberry Pi 3, but we recommend getting a Raspberry Pi 4 for the best performance.
Step 2: Download and Install the Operating System
Once you have your Raspberry Pi, you'll need to download and install the operating system. We recommend using Raspbian, which is the official operating system for the Raspberry Pi. You can download the latest version of Raspbian from the official Raspberry Pi website.
Step 3: Install Z-Wave Bindings
After you've installed the operating system, you'll need to install the Z-Wave bindings. The Z-Wave bindings are what enable your Raspberry Pi to communicate with your Z-Wave devices. You can download the Z-Wave bindings from the OpenZWave website.
Step 4: Install OpenHAB
Next, you'll need to install OpenHAB, which is an open-source home automation platform that integrates with Z-Wave devices. OpenHAB provides a user-friendly interface to control all of your smart home devices.
To install OpenHAB, go to the OpenHAB website and download the latest version. Follow the installation instructions provided on the website.
Step 5: Configure OpenHAB
After you've installed OpenHAB, you'll need to configure it to work with your Z-Wave devices. The OpenHAB website provides detailed instructions on how to configure your devices.
Once you've configured OpenHAB, you'll be able to control your Z-Wave devices from the OpenHAB interface.
In conclusion, setting up a Z-Wave gateway on a Raspberry Pi is a great option for those looking for an affordable and customizable smart home automation solution. By following these five easy steps, you'll be able to set up your very own Z-Wave gateway and start controlling your smart home devices with ease.
Posted on: Aug 12, 2022 Last updated at: May 4, 2023